Intel Gaudi Secure Boot Flow
On this Page
Intel Gaudi Secure Boot Flow
This document outlines the steps required to enable Secure Boot for Intel® Gaudi® 2 and Intel® Gaudi® 3 AI accelerators on Ubuntu 24.04.2, Ubuntu 22.04.5 and RHEL 9.4. Enabling this feature ensures that only signed drivers can be loaded, preventing the use of unsigned drivers and modules.
Prerequisites
Enable Secure firmware as described in Intel Gaudi Secure Firmware Flow.
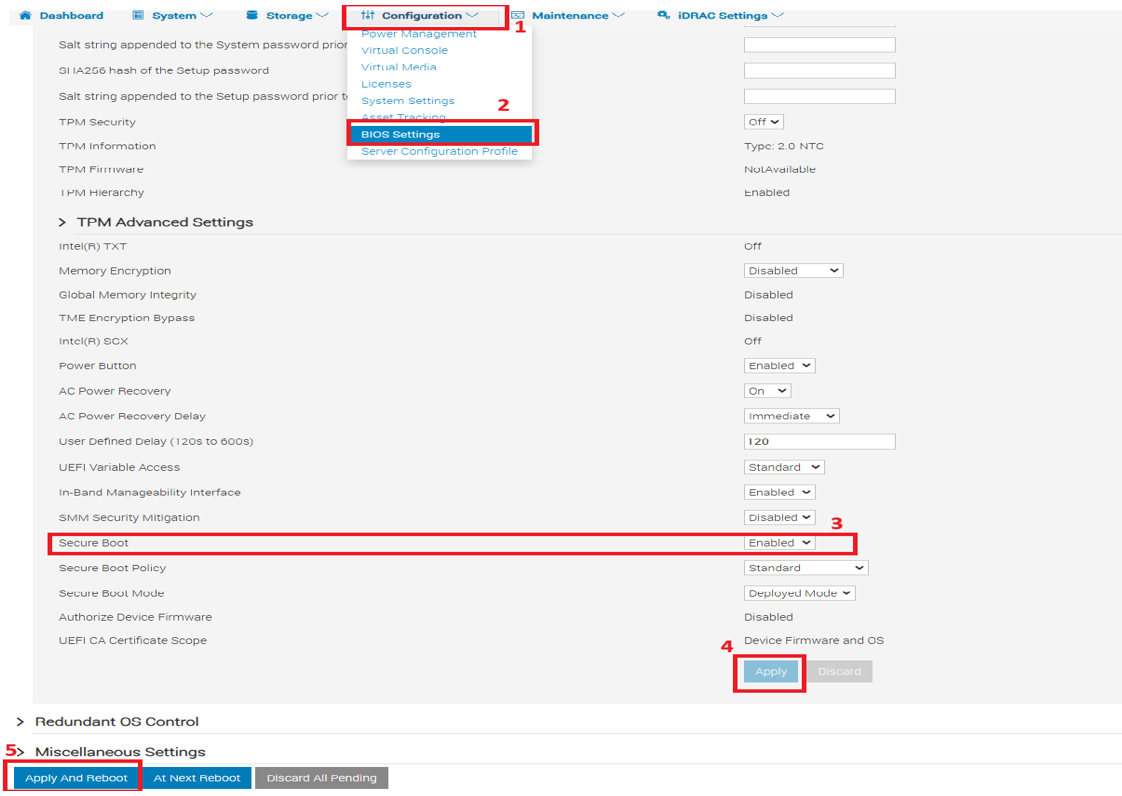
Verify that Secure Boot is enabled in BIOS:
Install Ubuntu 22.04.5 or Ubuntu 24.04.2 if it is not already installed. Follow the necessary installation procedures based on your hardware configuration.
Make sure you have root privileges. If you do not have them, switch to root user by running
sudo su.
Secure Boot Enabling Flow
Verify Secure Boot Status
Wait for the OS to boot and check the Secure Boot status by running the following:
sudo mokutil --sb-state
Expected output:
SecureBoot enabled
In case the output shows that the Secure Boot status is “disabled”, recheck your BIOS settings.
Install Headers and Modules
Install headers and modules by running the below:
sudo apt install linux-headers-`uname -r`
sudo apt install linux-modules-`uname -r`
sudo apt install linux-modules-extra-`uname -r`
sudo dnf update
sudo dnf install kernel-devel -y
Install Driver and Software
Note
Skip the steps below in case the driver and software are already installed.
When installing on a fresh OS, the driver initialization fails as the modules have not been signed yet. Ignore these error messages and proceed with the installation.
Install the driver and software as described in Install Driver and Software.
Install the software dependencies:
./habanalabs-installer.sh install -t dependencies
Generate Public and Private Keys
Set up a folder for key generation:
sudo mkdir ~/secure_boot
cd ~/secure_boot
Create an OpenSSL (
openssl.cnf) file by using the example below:# This definition stops the following lines checking if $HOME isn't defined. HOME = . RANDFILE = $ENV::HOME/.rnd [ req ] distinguished_name = req_distinguished_name x509_extensions = v3 string_mask = utf8only prompt = no [ req_distinguished_name ] countryName = CA # Update according to your configuration stateOrProvinceName = Intel Ave # Update according to your configuration localityName = Folsom # Update according to your configuration 0.organizationName = Intel # Update according to your configuration commonName = Secure Boot Signing # Update according to your configuration emailAddress = abc.xyz@intel.com # Update according to your configuration [ v3 ] subjectKeyIdentifier = hash authorityKeyIdentifier = keyid:always,issuer basicConstraints = critical,CA:FALSE extendedKeyUsage = codeSigning,1.3.6.1.4.1.311.10.3.6,1.3.6.1.4.1.2312.16.1.2 nsComment = "OpenSSL Generated Certificate"
Generate the private (
MOK.priv) and public (MOK.der) keys using OpenSSL:sudo openssl req -config ./openssl.cnf -new -x509 -newkey rsa:2048 -nodes -days 36500 -outform DER -keyout "MOK.priv" -out "MOK.der"
Enroll the key in Linux system using mokutil. Make sure to memorize the password you enter as it is also used for MOK key enroll in BIOS:
sudo mokutil --import MOK.der
Sign the Driver Module
Verify the installed DKMS version (e.g.
habanalabs-dkms-1.24.1-482):sudo dpkg -l | grep habana
sudo rpm -qa | grep -I habana
Check the driver path to verify the location of the installed modules:
sudo modinfo -n habanalabs
Copy all modules:
In case kernel files are compressed, make sure to uncompress the
habanalabs*.ko.zstfile into uncompressed*.kofiles:unzstd habanalabs.ko.zst unzstd habanalabs_cn.ko.zst unzstd habanalabs_en.ko.zst unzstd habanalabs_ib.ko.zst unzstd habanalabs_compat.ko.zst
Copy all
habanalabs*.ko.modules includinghabanalabs_compat.koto the~/secure_bootdirectory and sign them with the MOK key created earlier:cp /lib/modules/5.15.0--generic/updates/dkms/habanalabs*.ko ~/secure_boot/
In case kernel files are compressed, make sure to uncompress the
habanalabs*.ko.xzfile into uncompressed*.kofiles:unxz habanalabs.ko.xz unxz habanalabs_cn.ko.xz unxz habanalabs_en.ko.xz unxz habanalabs_ib.ko.xz unxz habanalabs_compat.ko.xz
Copy all
habanalabs*.ko.modules includinghabanalabs_compat.koto the~/secure_bootdirectory and sign them with the MOK key created earlier:cp /lib/modules/5.14.0-427.42.1.el9_4.x86_64/extra/habanalabs*.ko ~/secure_boot
Sign all the
.kofiles, including thehabanalabs*.kofile. The file size should increase after signing:cd ~/secure_boot/ sudo kmodsign sha512 MOK.priv MOK.der habanalabs.ko sudo kmodsign sha512 MOK.priv MOK.der habanalabs_cn.ko sudo kmodsign sha512 MOK.priv MOK.der habanalabs_en.ko sudo kmodsign sha512 MOK.priv MOK.der habanalabs_ib.ko sudo kmodsign sha512 MOK.priv MOK.der habanalabs_compat.ko
sudo /usr/src/kernels/$(uname -r)/scripts/sign-file sha512 MOK.priv MOK.der habanalabs.ko
sudo /usr/src/kernels/$(uname -r)/scripts/sign-file sha512 MOK.priv MOK.der habanalabs_cn.ko
sudo /usr/src/kernels/$(uname -r)/scripts/sign-file sha512 MOK.priv MOK.der habanalabs_en.ko
sudo /usr/src/kernels/$(uname -r)/scripts/sign-file sha512 MOK.priv MOK.der habanalabs_ib.ko
sudo /usr/src/kernels/$(uname -r)/scripts/sign-file sha512 MOK.priv MOK.der habanalabs_compat.ko
Verify that the signature is appended:
hexdump -Cv habanalabs.ko | tail -n 5
Expected output:
0021ce20  49 25 ce 79 70 d3 de b3  0c 20 a2 54 99 ee c1 ef  |I%.yp.... .T....|
0021ce30  00 00 02 00 00 00 00 00  00 00 01 ff 7e 4d 6f 64  |............~Mod|
0021ce40  75 6c 65 20 73 69 67 6e  61 74 75 72 65 20 61 70  |ule signature ap|
0021ce50  70 65 6e 64 65 64 7e 0a                           |pended~.|
Copy the signed modules back to the DKMS folder:
In case the kernel files were originally compressed and you uncompressed them in Step 3, make sure to compress them back as follows. This creates a
.ko.zstfile. Make sure to delete the.kofiles:zstd habanalabs.ko zstd habanalabs_cn.ko zstd habanalabs_en.ko zstd habanalabs_ib.ko zstd habanalabs_compat.ko
Copy the signed modules back to the DKMS folder where the modules are stored:
sudo cp habanalabs*.ko /lib/modules/$(uname -r) /updates/dkms/
In case the kernel files were originally compressed and you uncompressed them in Step 3, make sure to compress them back as follows. This creates a
.ko.xzfile. Make sure to delete the.kofiles:xz habanalabs.ko xz habanalabs_cn.ko xz habanalabs_en.ko xz habanalabs_ib.ko xz habanalabs_compat.ko
Copy the signed modules back to the DKMS folder where the modules are stored:
cp ~/secure_boot/habanalabs*.ko /lib/modules/$(uname -r) /extra
Load the signed module. The modules should be loaded successfully when the key is already enrolled. If the key is not enrolled, the modules load fails and the following message appears:
modprobe: ERROR: could not insert 'habanalabs_compat': Key was rejected by service
In this case, reboot the system and proceed to the next section:
sudo modprobe habanalabs_compat &&
sudo modprobe habanalabs_en &&
sudo modprobe habanalabs_ib &&
sudo modprobe habanalabs_cn &&
sudo modprobe habanalabs
Enroll the Key in BIOS
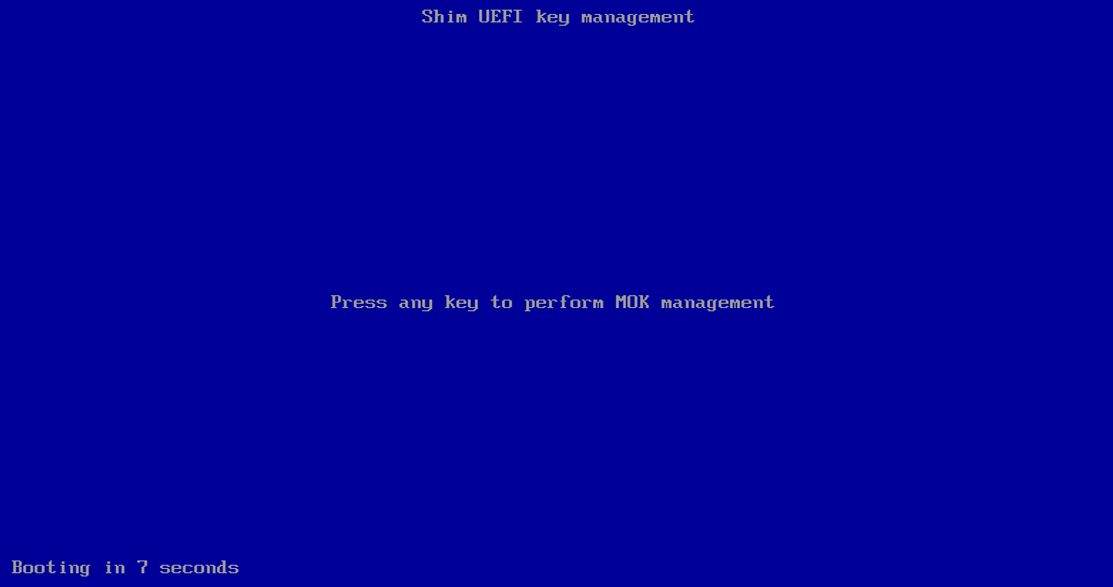
BIOS opens the MOK (Machine Owner Key) Management page automatically. Once opened, perform the following steps:
Press any key to continue:
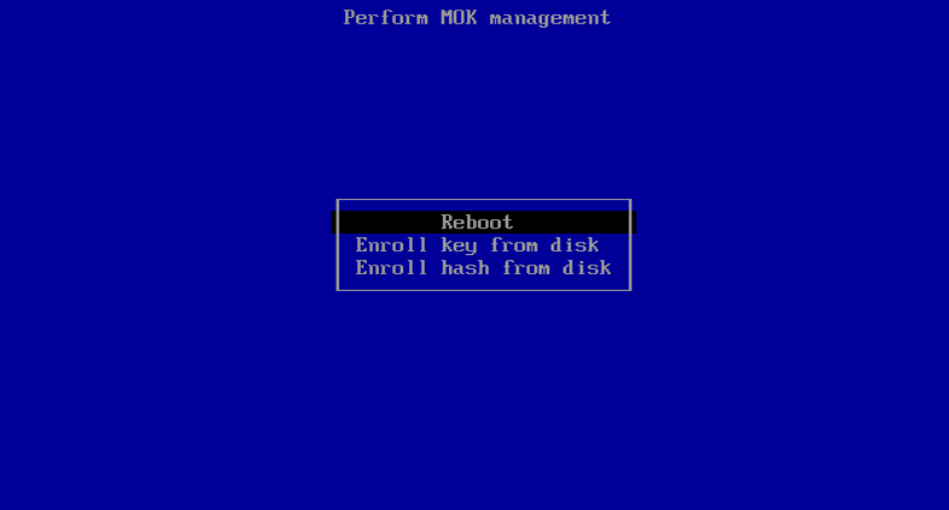
Select “Enroll MOK”:

Select “View Key 0”:

Verify the signing name as specified in the
openssl.cnffile and press Enter:
Select “Continue” to proceed to the enrollment:

Select “Yes” to enroll the key:

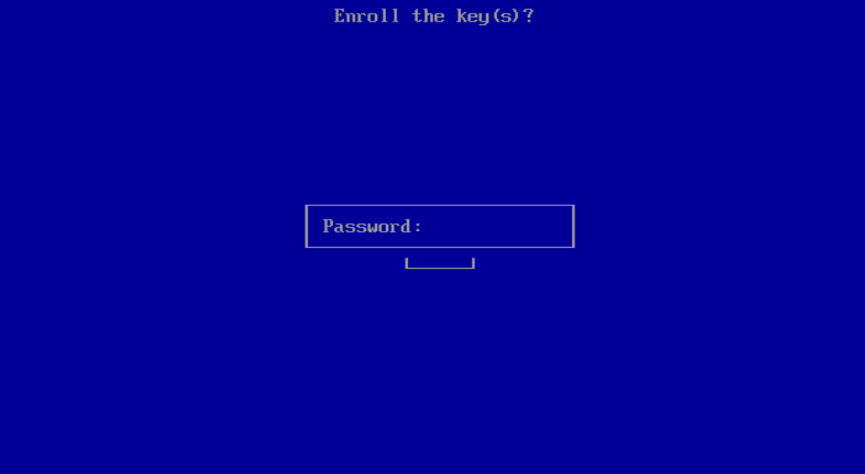
Enter the password created in for the key enrollment in Linux:
Select “Reboot”:
Verify Functionality
Check the Secure Boot status:
sudo mokutil --sb-state
Expected output:
SecureBoot enabledRun
hl-smito verify the driver status. The output should look similar to the below: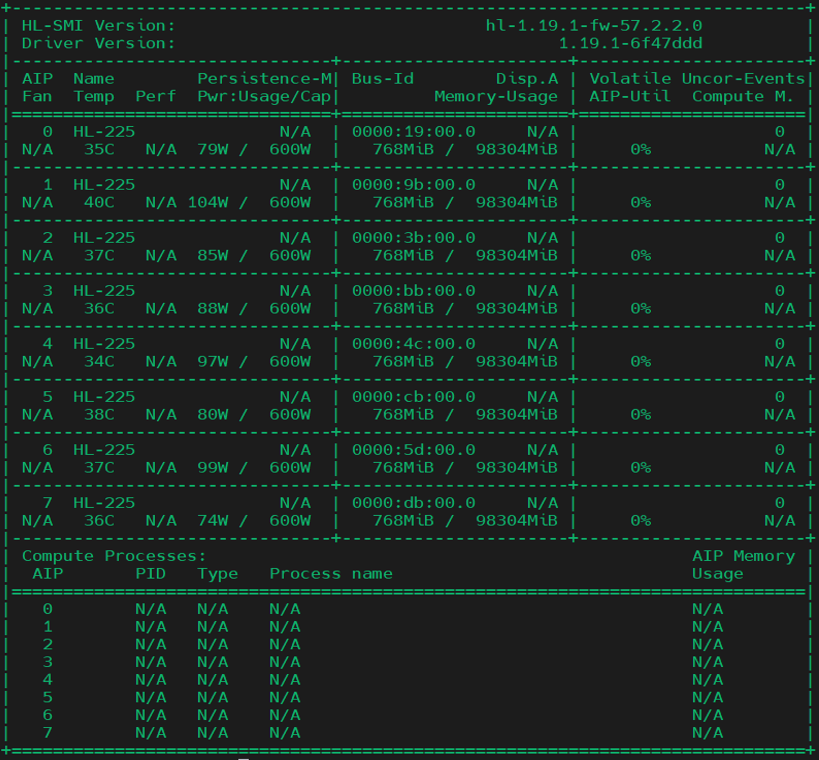
Known Limitations
hl-fw-loader
The hl-fw-loader does not function once Secure Boot is enabled. This includes the FW hash and the FW update features:
In-band FW updates are not supported in Secure Boot mode, which minimizes the risk of unauthorized modifications.
Since the
hl-fw-loaderoperates without a driver, it can access the PCIe BAR directly. Secure Boot effectively prevents this behavior.
Workaround:
Load the FW with the BMC using OOB protocol. For more details, refer to Gaudi 3 OOB Management Specification available the Intel Gaudi vault and Intel RDC.
Do not enable Secure Boot on systems that utilize IPMI and I2C direct protocols as they do not support OOB FW updates.
hl_qual
hl_qual is unable to access debugfs when Secure Boot is enabled. As a result, Memory bandwidth test cannot run.
Workaround:
Disable Secure Boot for investigations.
Alternatively, coverage is provided by the following tests:
hl-smi
hl-smi daemon mode does not function once Secure Boot is enabled resulting in blocking of the virtual UART debug: hl-smi dmon -i <bus_id>.
Workaround:
Disable Secure Boot for investigations.
HCL
Habana Communications Library (HCL) is unable to bring up network interfaces due to lack of debugfs access.
Hypervisor Tools Package
Hypervisor tools package (hl-smi-async, Memory Scrub Verification) does not function once Secure Boot is enabled.